How to Measure Clothes for a Size Chart
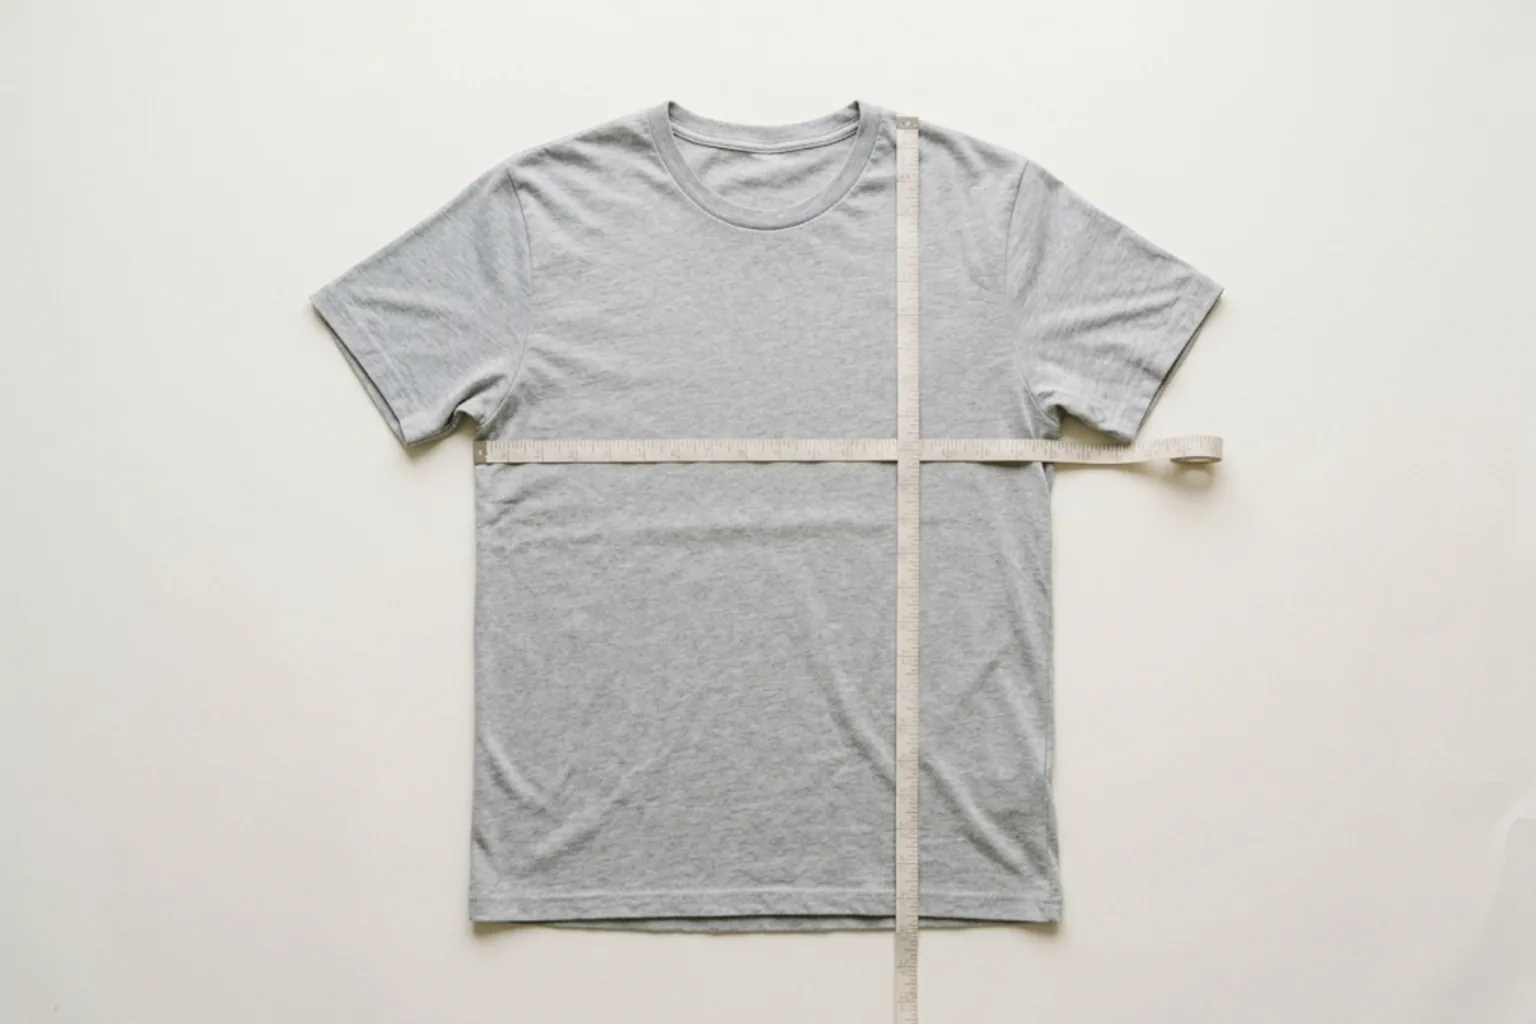
Shoppers read a size chart by holding it up against something they already own. They lay a T-shirt that fits well on the bed, measure across the chest, compare that number with your chart, and decide between M and L.
The trouble is that one garment produces different numbers depending on where the tape starts and stops. Some sellers measure chest width right at the armpit; others drop a few centimeters below it. Some measure length from the side of the neck; others from the center back. If your chart has numbers but no reference points, shoppers will read those numbers the way another store taught them to. Your numbers can be accurate and the garment can still fit differently than they expected.
I have designed clothing and managed production for years, and every work order I sent to a factory carried a size chart. The basic chart on my denim work orders listed six points for each size: waist, hip, thigh, leg opening, rise and total length. Whether a size chart goes to a factory or to a customer, the rule is the same: a number only means something when the reader knows where it was taken.
Three decisions before you pick up the tape
Before measuring anything, settle three rules that apply to the whole chart.
- One unit, consistently. Use centimeters (to the nearest 0.5) or inches, not a mix inside the same table. If you sell internationally and want both, give inches their own column.
- Say whether it is flat width or circumference. Chest, waist, hip, thigh and hem are usually measured with the garment lying flat, edge to edge. Double the flat width and you get the circumference. Label the column "chest (flat)" or add a line under the chart: "Flat measurements; double for circumference." This stops shoppers from comparing their full chest circumference with your half-width number and ordering two sizes too small.
- Measure the garment lying flat. Close zippers and buttons, smooth out wrinkles by hand without stretching the fabric, and keep the tape in a straight line on top of the garment.
Tops: five points and where each one starts
- Shoulder width — straight across from one shoulder seam point to the other.
- Chest (flat) — from the bottom of one armhole, where sleeve meets body, straight across to the other. If you measure a set distance below the armhole instead, write that distance under the chart.
- Sleeve length — from the shoulder seam point to the end of the cuff, with the sleeve smoothed flat. Include a rib cuff if there is one.
- Total length — from the high point of the shoulder (where the neckline meets the shoulder seam) down to the hem. If you measure from the center back neck, say so. For garments with a longer back than front, give front and back length separately.
- Hem (flat) — across the hem from edge to edge. This matters most for cropped tops and banded hems, where the hem shape decides how the garment sits.
Raglan sleeves have no shoulder seam, and drop-shoulder styles move the seam down onto the arm. Measuring shoulder width and sleeve length separately on these will not match anything in the shopper's wardrobe. Instead, measure in one line from the center back neck, over the shoulder, to the end of the sleeve, and list it as "center back to cuff." Mark the shoulder column "drop shoulder" rather than filling it with a number that misleads.
Bottoms: six points
The six points on my old denim charts are the same six that belong on a retail size chart.
- Waist (flat) — across the top edge of the waistband, end to end.
- Hip (flat) — straight across at the widest part of the seat, near the bottom of the front zipper. Decide a fixed height (a set distance below the waistband) and measure every size at that same height.
- Thigh (flat) — across one leg, just below the crotch seam.
- Rise — from the top of the front waistband down to the point where the crotch seams meet. Front rise is the usual figure; if you give back rise as well, label both. Rise tells a shopper where the pants will sit on the body, so it is often the column people check first.
- Leg opening (flat) — across the hem of one leg.
- Total length — from the top of the waistband to the hem along the outside seam. If you use inseam instead, label it as inseam.
Stretchy garments need two numbers
A single number does not describe the fit of an elastic waist, a knit or a high-stretch fabric.
- For elastic waistbands, give the relaxed and fully stretched measurements together, for example "waist (flat) 32–44 cm," with a note underneath: "Elastic, relaxed to fully stretched."
- Lay knits out naturally without pulling. Knit measurements change with how hard you smooth them, so measuring every size the same way matters more than the exact figure.
- Add one plain sentence about stretch, such as "Stretchy; the chest gives more than the flat measurement suggests."
Measure every size, and measure again for each new batch
It is tempting to measure the M and add or subtract a fixed amount for S and L. But the steps between sizes differ from one body point to another, and finished garments can drift a little from the planned specs. A retail size chart should be a record of the actual garments, not of the plan, so lay out one finished piece in every size and measure each.
If you reorder the same style, or the stock comes from a different factory, measure again. A change of fabric or maker can shift the numbers even when the pattern is identical.
Hand measuring always carries some variation, so put a line under the chart: "Measurements may vary slightly depending on method." Treat that sentence as a supplement to clear reference points, never as a replacement for them.
Tell shoppers how to compare
One instruction directly under the chart cuts down on sizing questions:
"Lay a similar garment that fits you well flat, measure it at the points shown in the picture, and compare."
That only works if there is a picture. Photograph one of the garments you are selling laid flat, draw lines over it, and label them: shoulder, chest, length. If you shoot it in the same session as your product photos, it costs you a few extra minutes.
With AI try-on photos, the size chart is nearly all the shopper has
Product pages usually carry a line like "Model is 168 cm and wears size M." Shoppers compare that with their own height to guess the fit.
You cannot write that line under an AI-generated try-on image. The AI model never wore the garment, so it has no height and no size. I went through this in more detail in Before You Put AI Try-On Photos on a Product Page. What remains for the shopper is your size chart and a sentence or two describing fit on the body.
So the more you rely on AI try-on images, the more complete the chart should be:
- Fill every column and state every reference point.
- Add a body-based description, for example "Length covers about half the seat; sleeves end at the wrist bone."
- If a staff member or friend has actually worn the garment, give their height and size separately as real-wear information.
In Korea, a size chart is also part of what the law asks of online clothing sellers: "dimensions" is one of the product information items a seller must provide. And if what arrives does not match what the product page described, the buyer can return it within three months of delivery, with the seller paying return shipping. A size chart that differs noticeably from the real garment can lead straight there, so write down exactly what you measured. Rules elsewhere differ, but a chart that matches the garment protects you in any market.
Before you publish
- Does the chart state the unit and that measurements are flat?
- Is every reference point shown in a picture or described in words?
- Did you measure every size on a real garment, with no calculated cells?
- Do elastic waists and knits show relaxed and stretched figures, or at least a stretch note?
- For drop-shoulder or raglan styles, did you give center-back-to-cuff instead of shoulder width?
- With AI try-on photos, did you replace model height and size with a full chart and a body-based description?
- If this is a reorder, did you measure the new batch?
If you need a backdrop and lighting to shoot product photos and measurement photos in one session, Botong Lee Studio, a five-minute walk from Hansung University Station in Seoul, rents its 17-pyeong (about 56 m²) ground floor exclusively by the hour: 15,000 won per hour for two people, two-hour minimum (30,000 won), with backdrops and lighting included. For try-on images made from photos of garments on a hanger, there is Wearoom.
Services by Botonglee