WEAROOM Guide: How to Make On-Model Photos from a Single Garment Shot, and What It Costs
If you sell clothes online, you need photos of the clothes being worn. A proper shoot with a model and a studio gives you the most accurate result, but once you have dozens of new styles a month, booking a shoot for each one stops making sense.
WEAROOM is the AI studio I built for that gap. You upload a photo of a garment and a photo of a model, and it generates the model wearing that garment. We recently got a customer question that boiled down to "How does the monthly payment work, and how do I actually use this?" This guide answers both, with real screenshots taken from the live site.
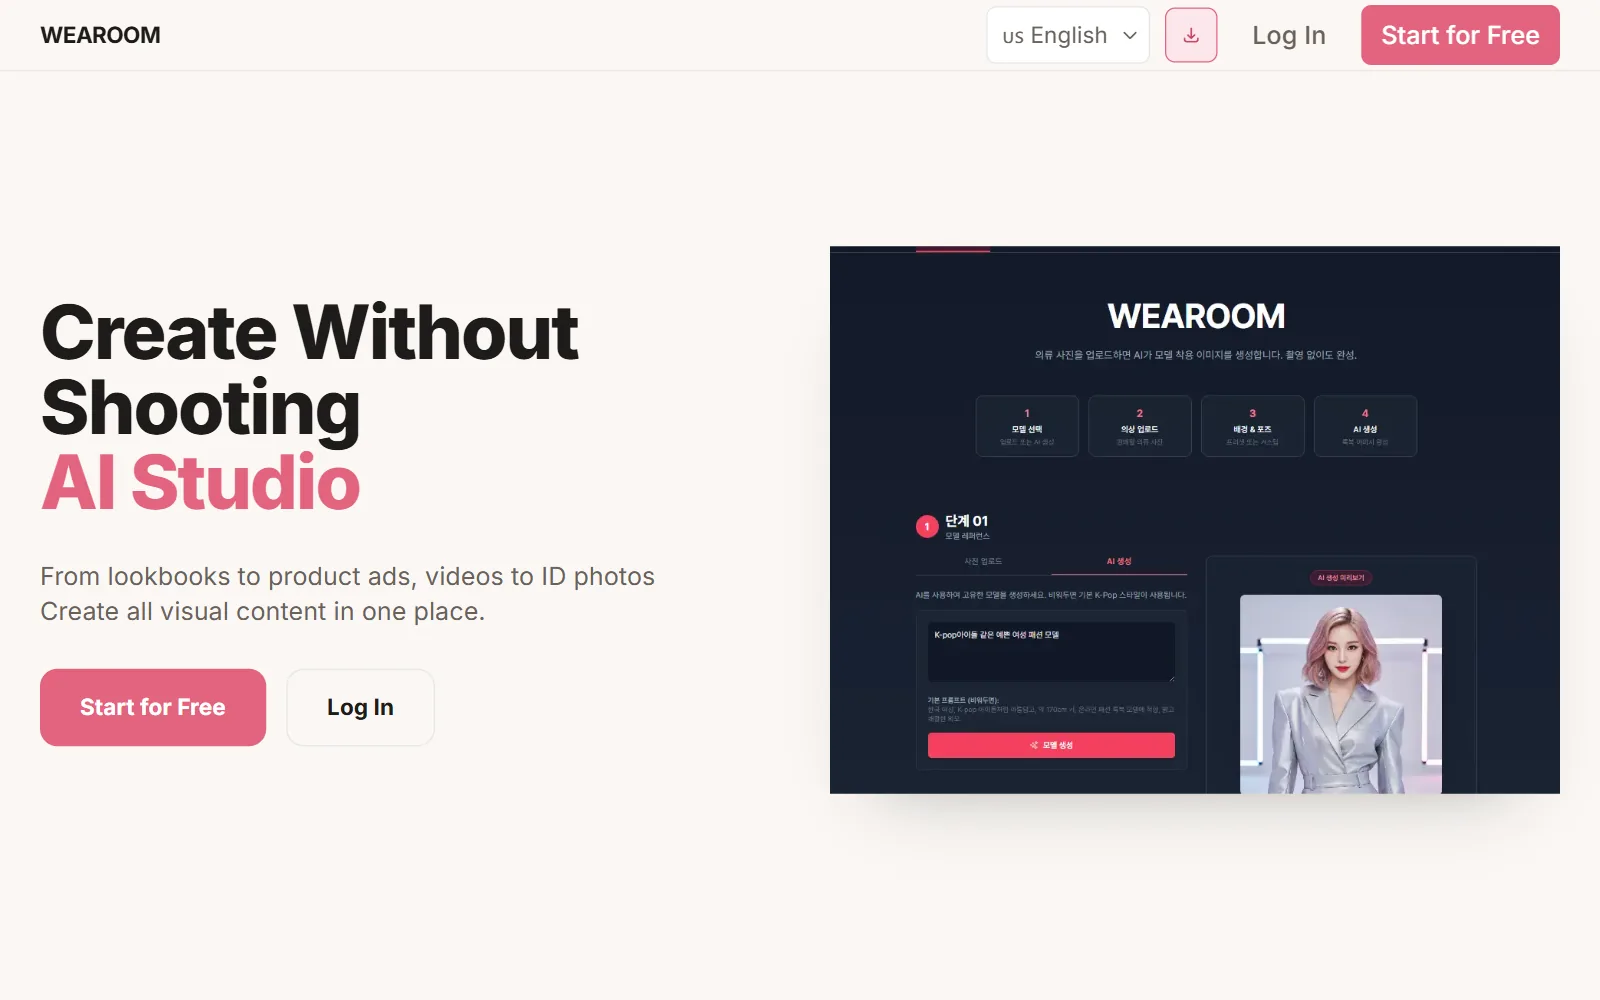
Start with the 10 free images
Every new account gets 10 images free. Try it on one of your own garments before you pay for anything.
Sign up at wearoom.app with a Google account or an email address. The site switches between Korean and English with the button in the top-right corner. Once you log in, you land in the studio, and your remaining image balance sits at the top of the screen.
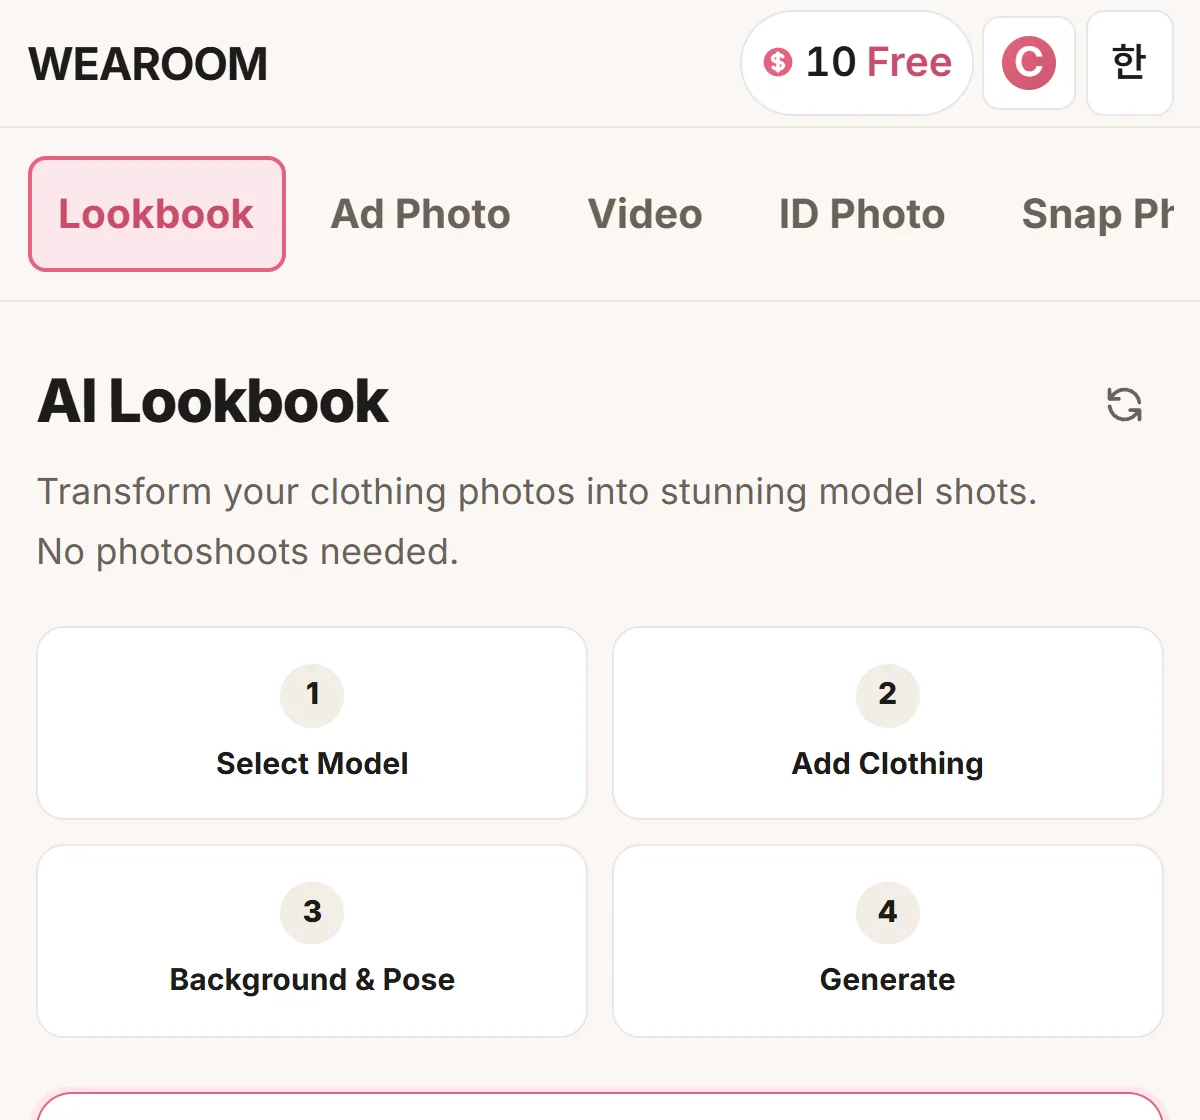
Making on-model photos, step by step
The default tab is Lookbook. You fill in four steps in order, and each one unlocks the next. When all four are done, the generate button appears.
Step 1: Select a model
This is the person who will wear your garment. You have two options.
After uploading, a preview appears. Tap Confirm & Use Model to finish this step.
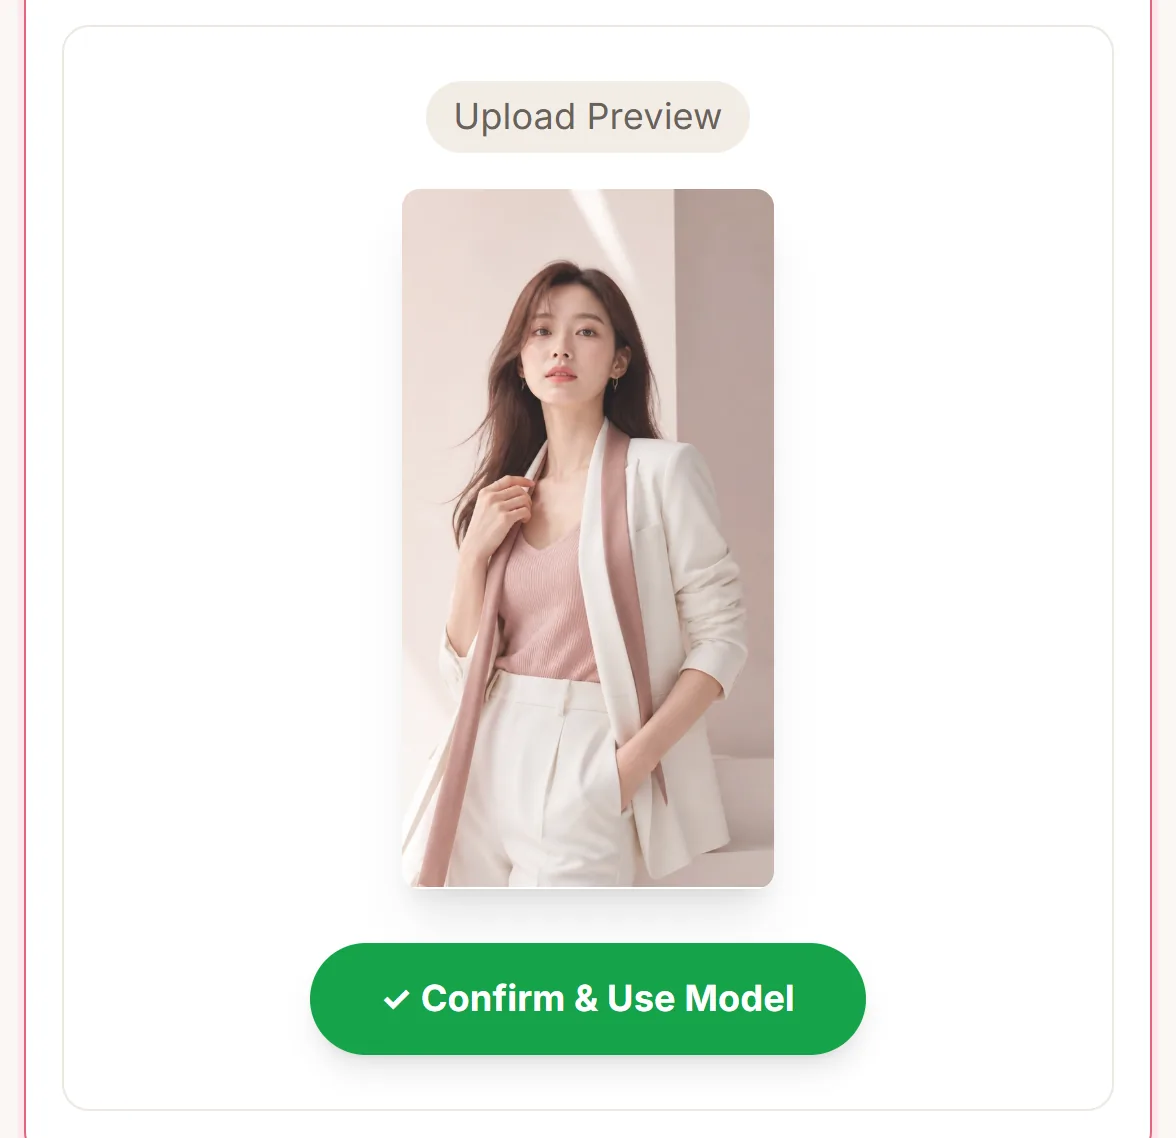
According to the notice on that screen, the original photo you upload is not stored on the server. It is used only to generate the images.
Step 2: Upload the clothing
Tap Add Clothing Item and pick a category. The list runs from T-shirts, shirts and knitwear to trousers, dresses, bags, shoes and jewelry. Then upload a front photo of the item. The front is required. The back is optional, but add it if you have one. You can add up to 10 items.
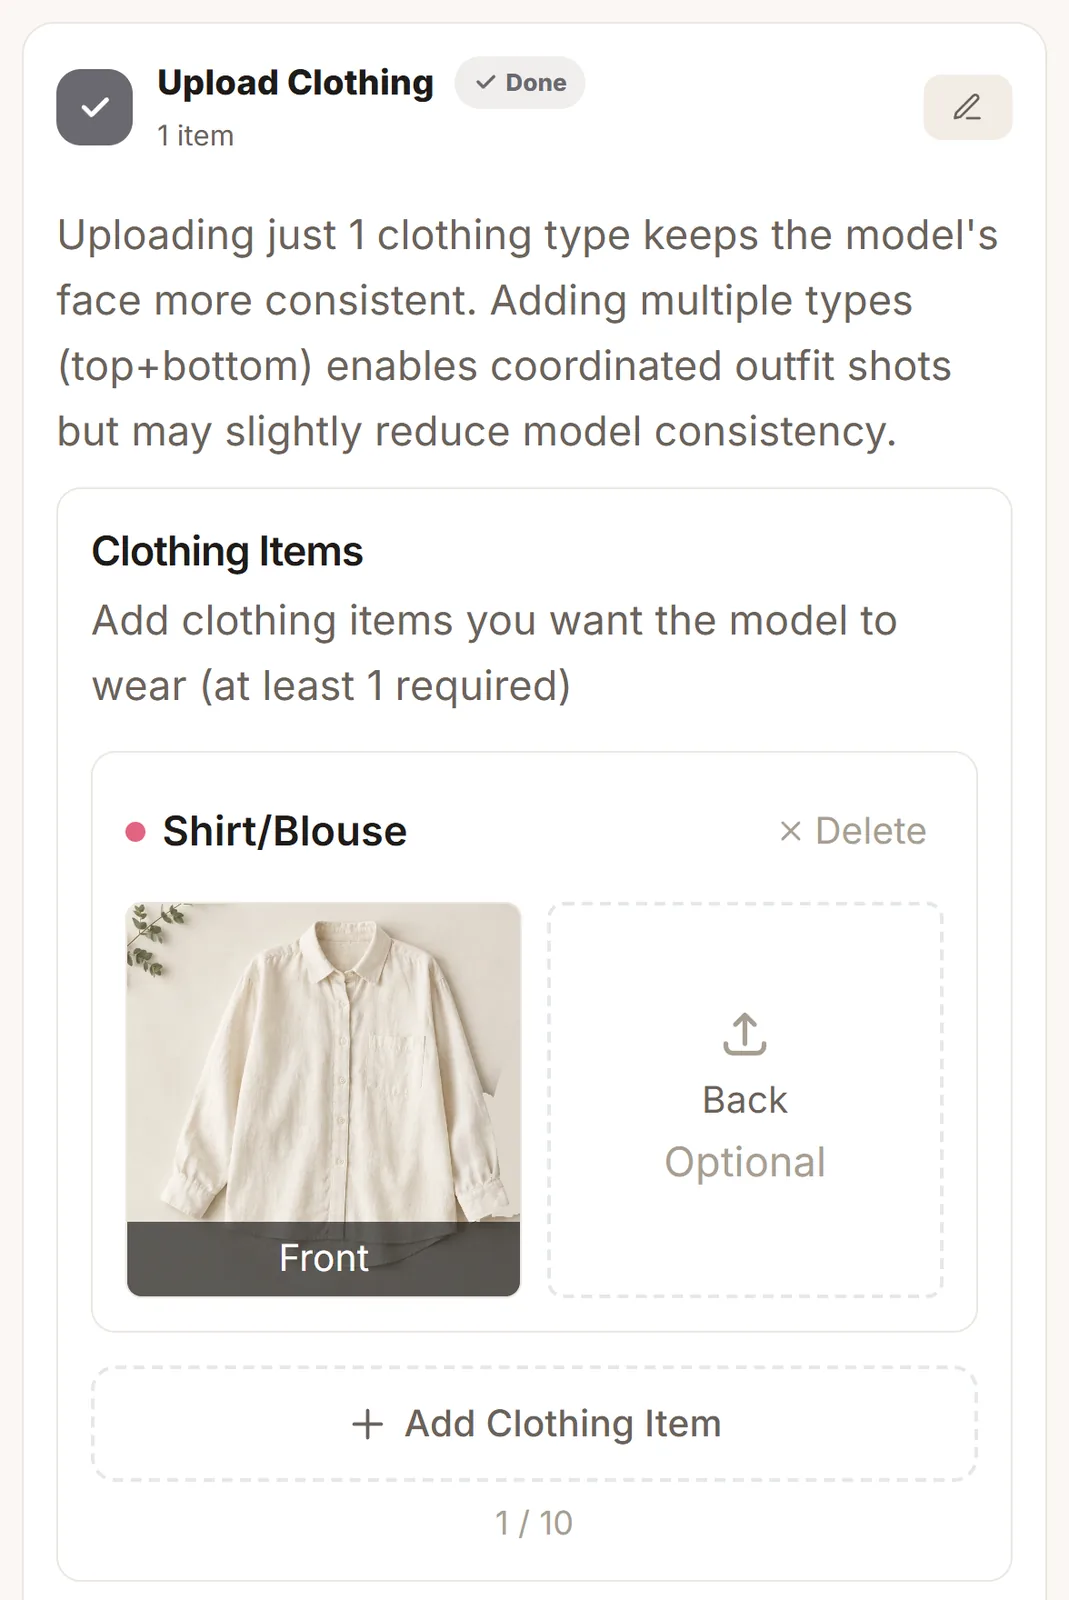
The tip that makes the biggest difference: upload one clothing item at a time if you want the model's face to stay consistent. Uploading a top and bottom together does give you a styled outfit shot, but the face can drift a little from image to image. For product pages where the same face should carry through, generate one item at a time.
Under Add Detail Photos (Optional) you can add close-ups of buttons or fabric texture, or describe the garment in words, such as "oversized fit, gold buttons."
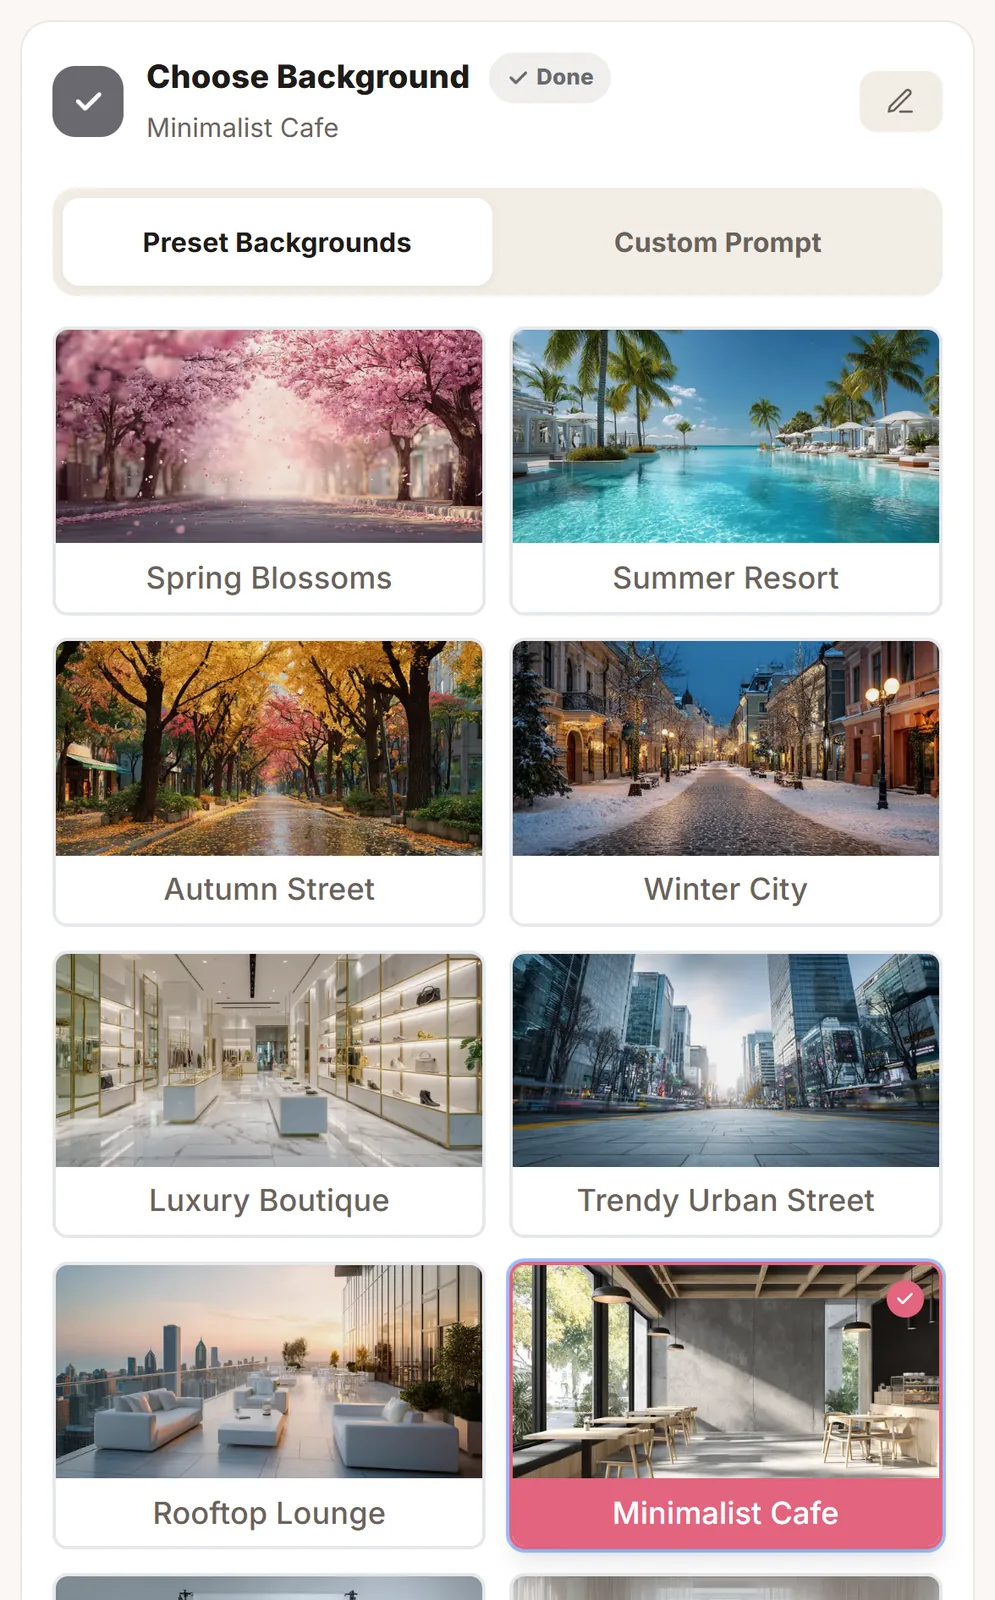
Step 3: Choose a background
Pick one of 50 preset backgrounds: seasonal streets, cafés, living rooms, clean studios and editorial-style locations. If none of them fits, switch to Custom Prompt and describe the setting you want.
Step 4: Choose poses
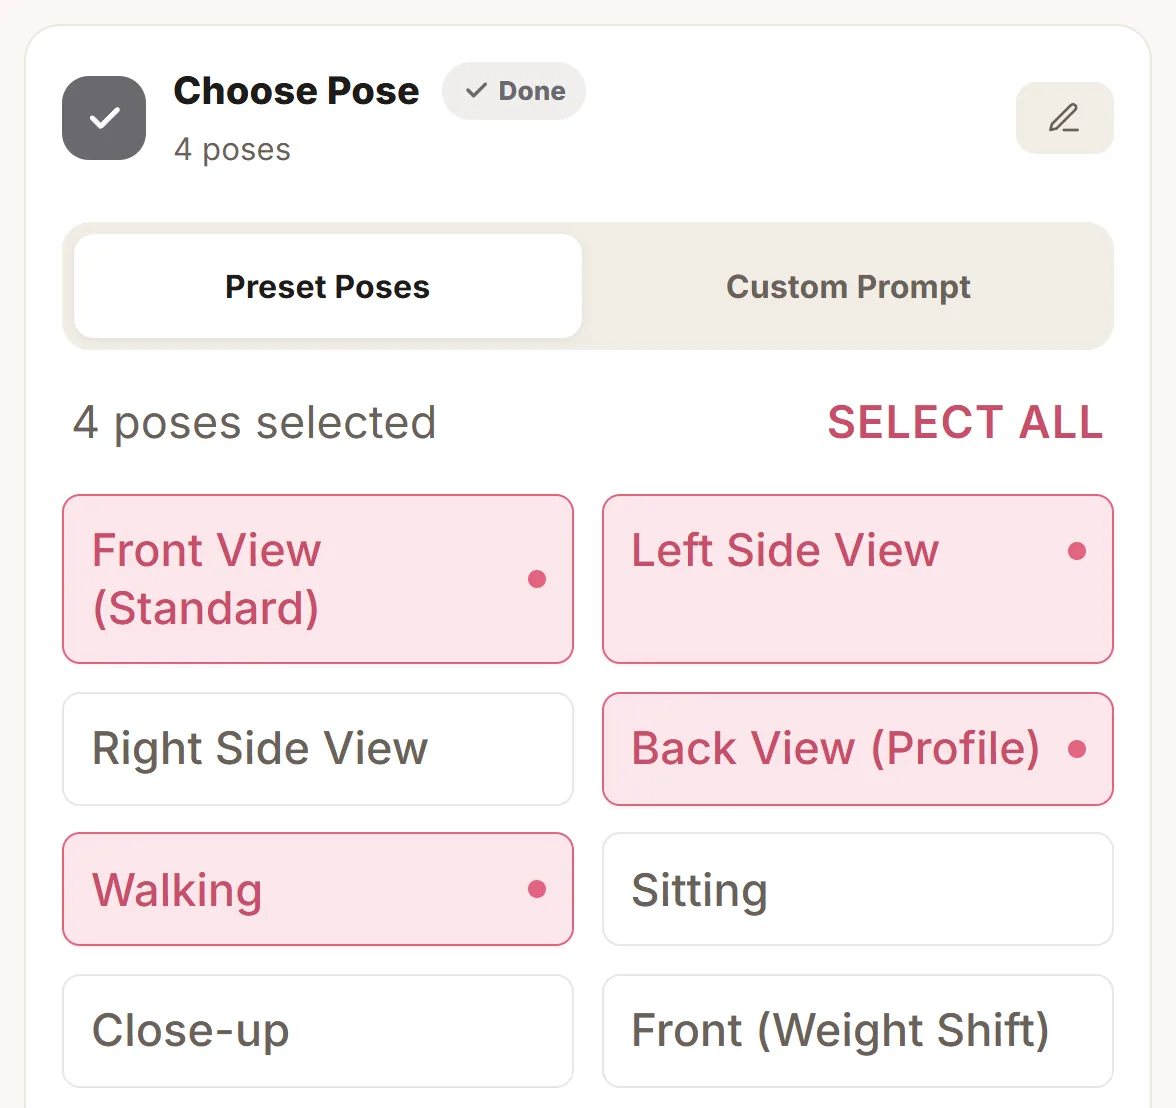
There are 40 poses, and each pose you select produces one image. Four are selected by default (front, left side, back and walking), so leaving them as they are gives you four images. If you only need a front view, tap the others to deselect them. A custom prompt option is here too, for describing a specific movement.
Finally: choose the quality and generate
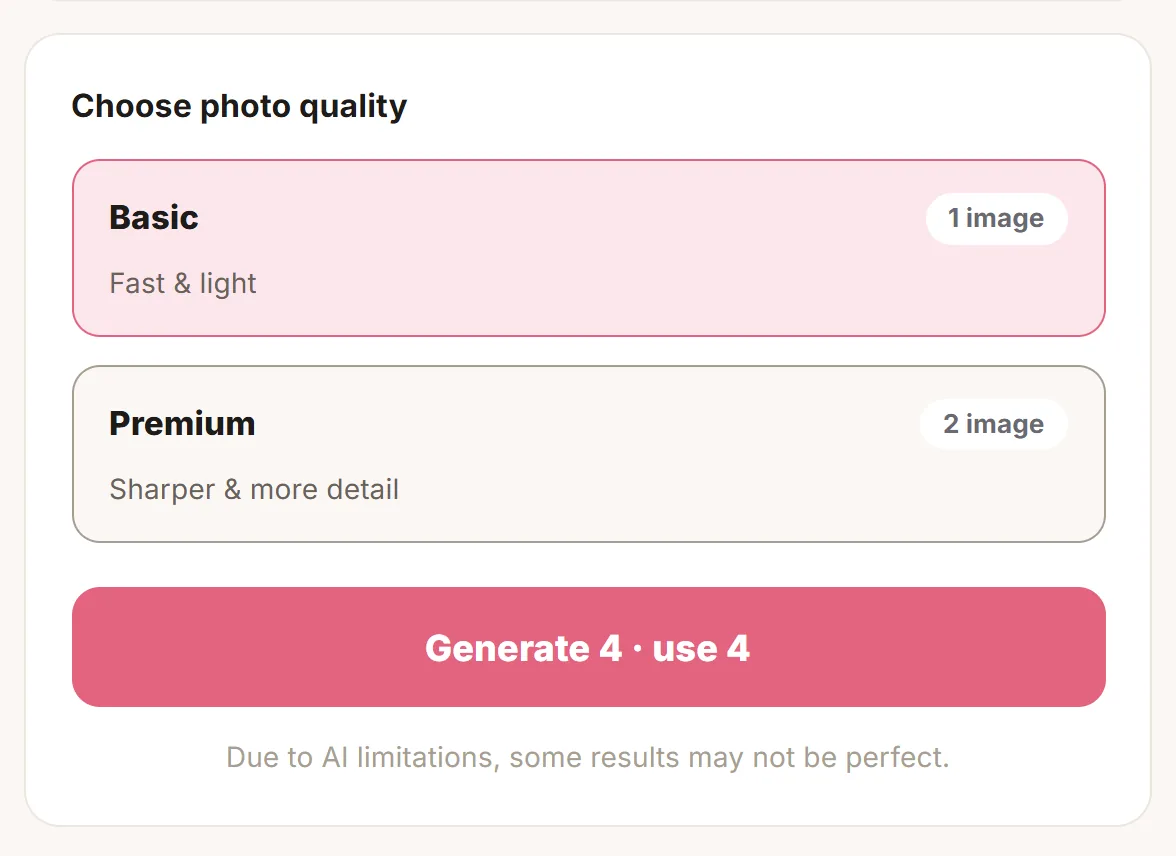
There are two quality levels.
The button tells you exactly how many credits it will use before you press it, for example "Generate 4 · use 4."
What the results look like
These two images were generated in WEAROOM in September from the same cream shirt and the same model photo used in the screenshots above.
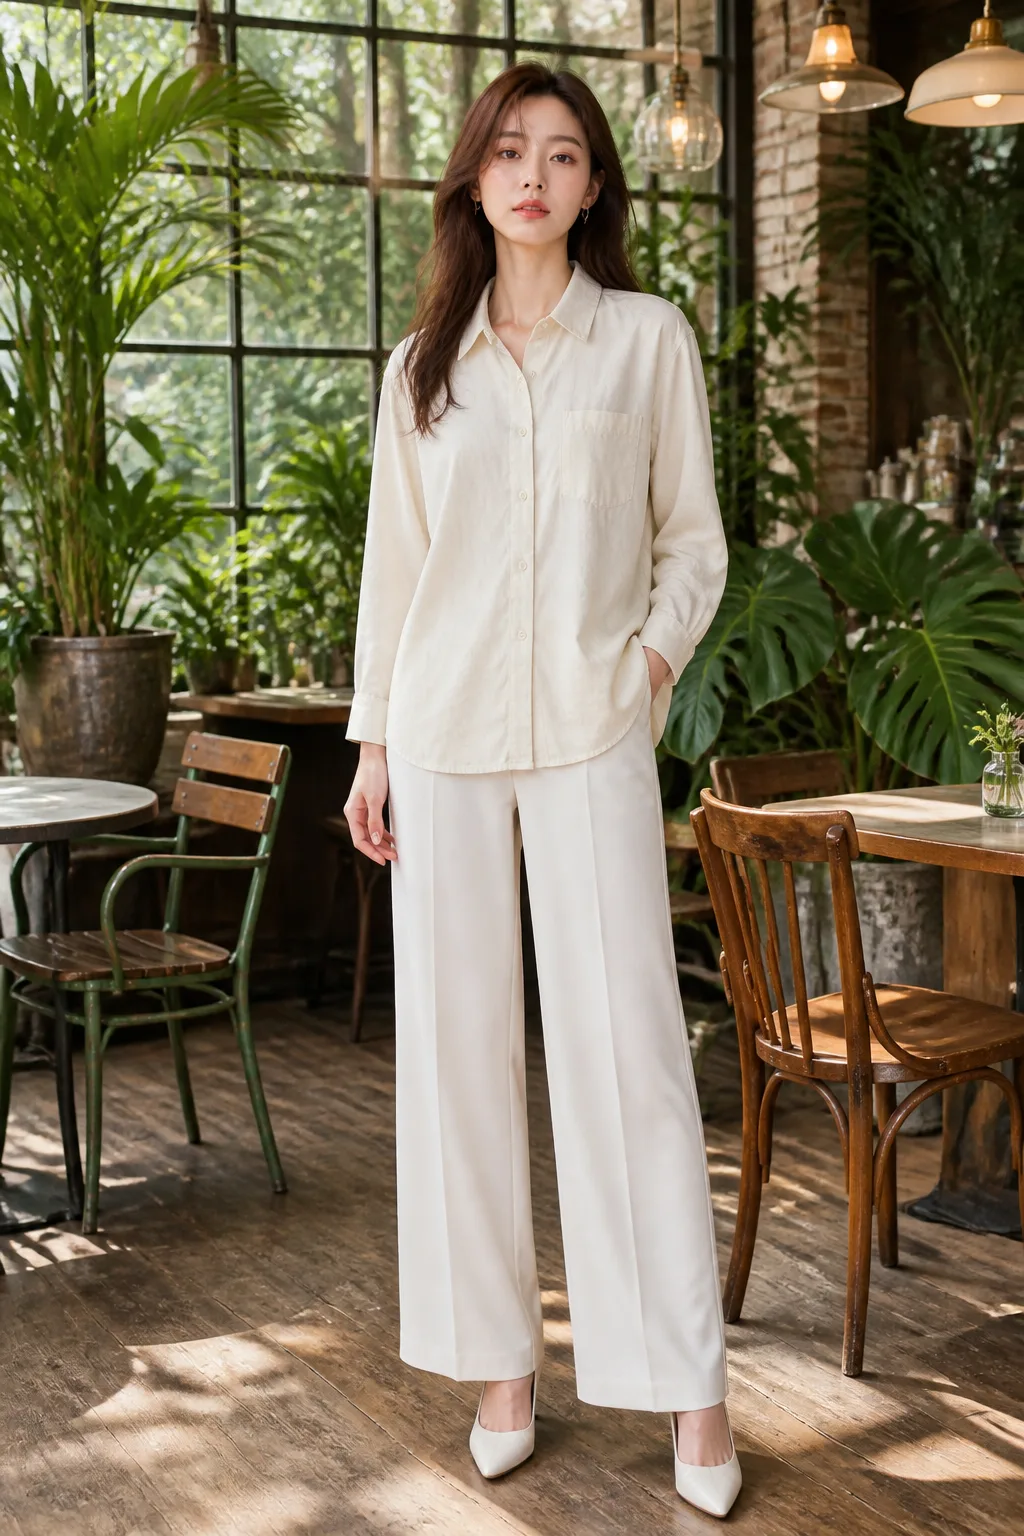
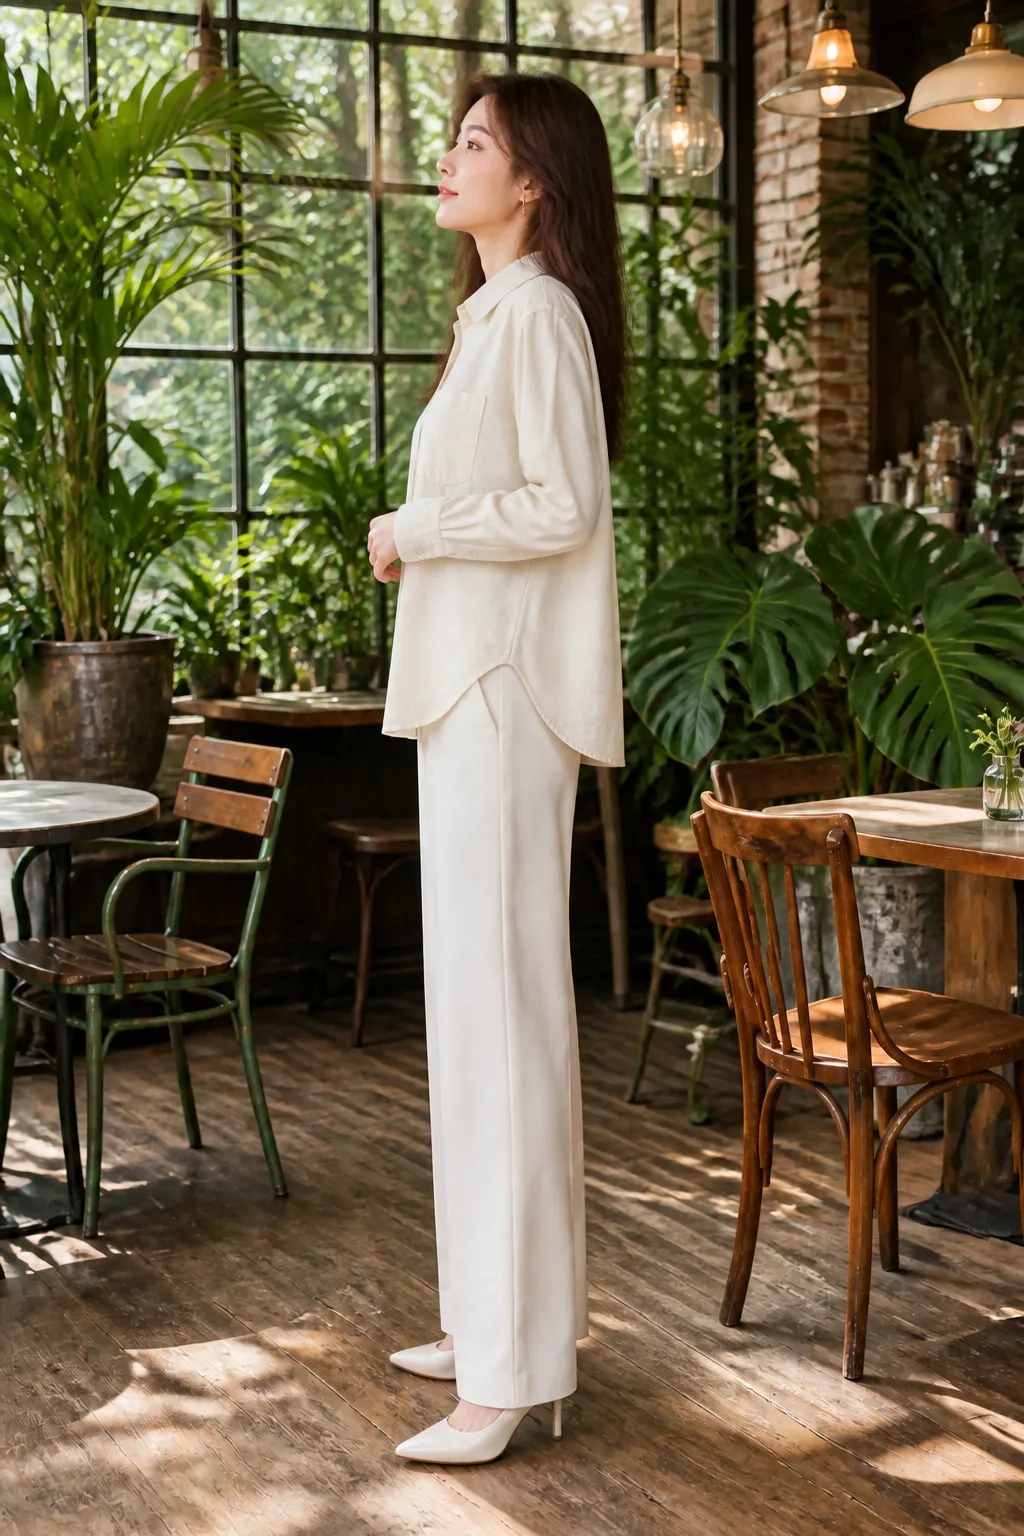
Not every image will be perfect. That comes with generating images by AI. When something looks off, generate it again, but keep in mind that regenerating also uses credits. When you estimate how many images you need in a month, leave some room for retakes.
Generated images can be downloaded in high resolution. The studio notes that results are deleted automatically after 30 days, so download the ones you want to keep as you go.
Monthly plans
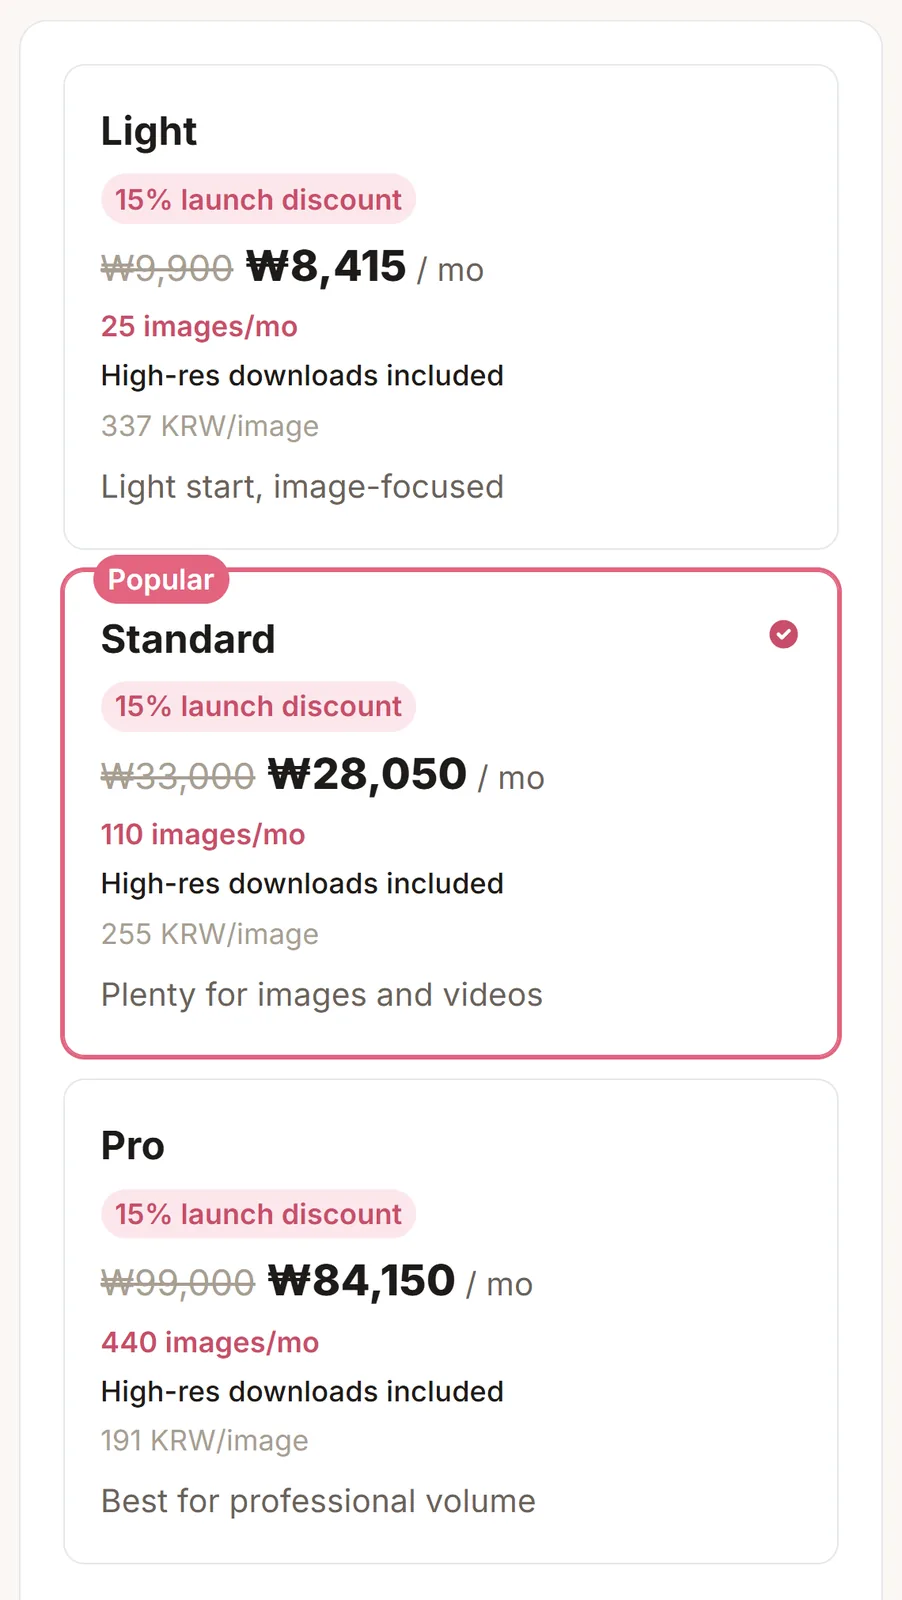
WEAROOM runs on monthly plans that give you a set number of image credits each month. A 15% launch discount currently applies.
Credits are used like this.
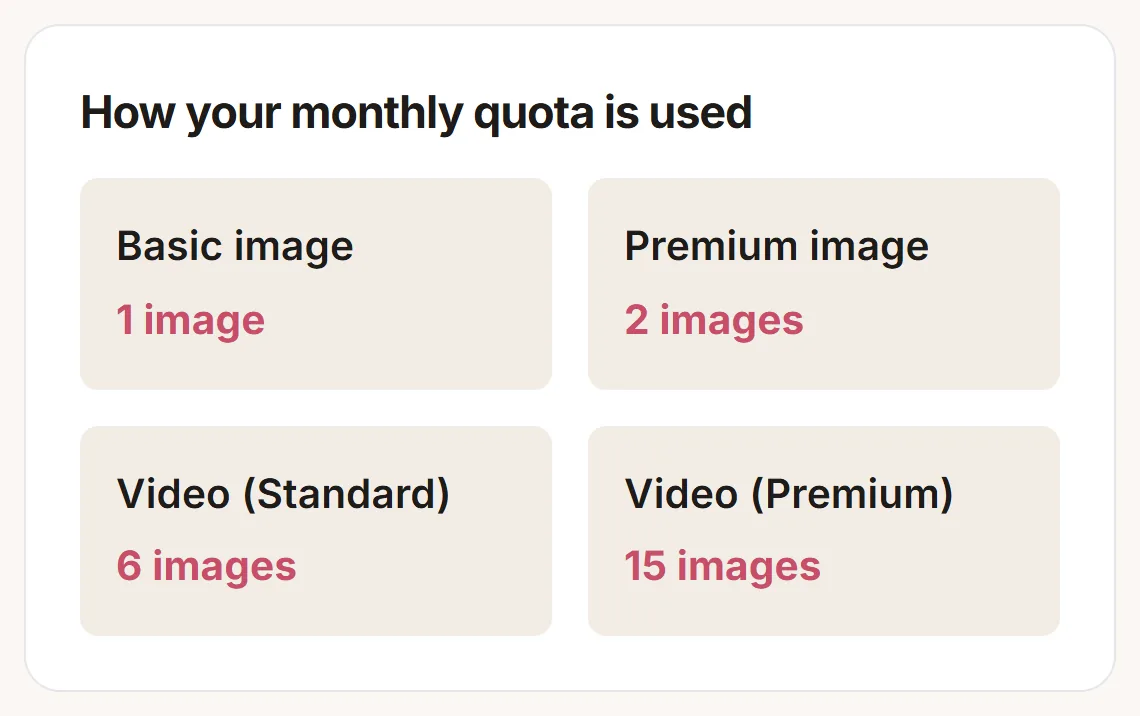
Here is a quick example. Fifteen new styles a month, shot front and side in Basic quality, comes to 30 credits. Add a few retakes and Light's 25 credits will not cover it, so Standard is the right fit. The same 30 shots in Premium would use 60 credits.
How billing and cancellation work
Starting a plan. On a computer, use the Plans menu at the top of the site. On a phone, tap your remaining balance at the top of the studio and choose Monthly Subscription (Korean cards). You can also go straight to wearoom.app/pricing. Choose a plan and register your card. The first charge happens that day, and you can start using it right away.
Monthly billing. After that, your card is charged automatically on the same date each month. Credits refill on each billing date, and unused credits do not roll over to the next month.
Changing plans. If you run short, you can upgrade immediately. The new plan's full price is charged on the spot, the new credits arrive right away, and your billing date moves to that day. Downgrades take effect from your next billing date.
Cancelling. Go to My Page and tap Cancel membership. You keep access until the end of the period you already paid for, and nothing more is charged. If you change your mind, you can undo the cancellation in the same place.
Refunds. If it has been 7 days or less since your billing date and you have not used any of that month's credits, you can get a full refund for that month, and the plan ends immediately. Once any credits have been used, that month is not refunded, and a cancellation takes effect at the end of the period. The details are in the refund policy.
If a payment fails. If an automatic charge does not go through, for example because of a card limit or an expired card, the pricing page will show a notice. Register a card again within 3 days of the billing date and your plan continues. After that, the plan ends.
Paying from outside Korea
The monthly plans are billed in Korean won through a Korean card payment system. If you are paying from abroad, use the one-time image packs paid with PayPal instead. Tap your balance at the top of the studio and choose PayPal. Packs come in 10, 100 and 400 credits, priced at ₩3,740, ₩28,050 and ₩84,150 with the launch discount.
PayPal charges in US dollars at the exchange rate on the day of purchase. At the rate on October 2, 2026 (1 USD = 1,355.84 KRW), that works out to about $2.76, $20.69 and $62.06. Purchased credits can be used, or refunded if unused, for one year from purchase. Credits are counted the same way as on the monthly plans.
Five things to check before you pick any AI photo service
WEAROOM is not the only tool that makes on-model images. Whichever one you use, these five checks will keep you from paying more than you expected.
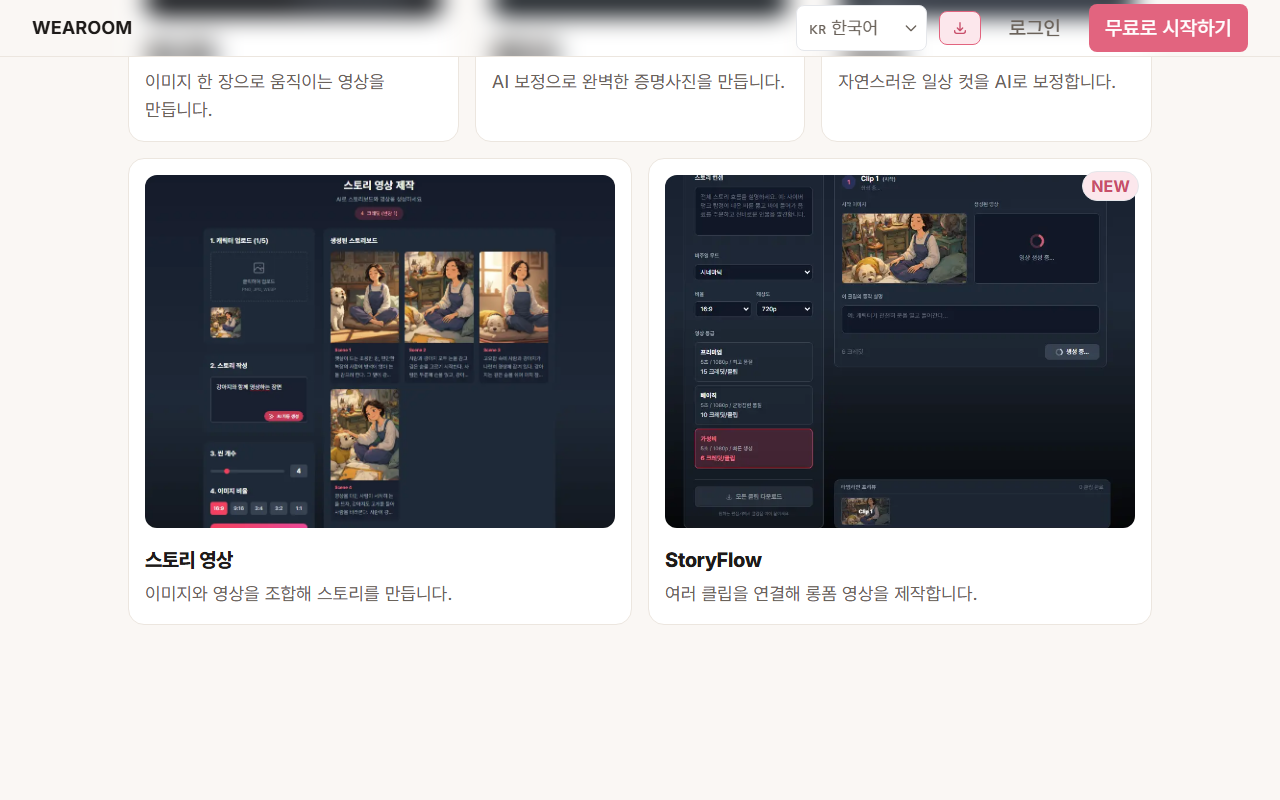
More than lookbooks
The tabs at the top of the studio also cover these. They all draw from the same monthly credits.
Who it suits
For shots where the real fabric has to show exactly, such as how a material drapes or its true color, a real photo shoot is still the right call. My recommendation is to shoot your key styles and fill in the rest with WEAROOM. I wrote more about how to make that call in three ways to get on-model shots for a small brand and a practical order for wholesale worn shots.
If you get stuck, log in and leave a message on WEAROOM's contact page. Questions about payments, how to use the studio and refunds are all welcome.
Services by Botonglee